Set up Mac screen sharing fast. Make remote control feel instant.
Skip VPNs and network configs.
Just connect and control your Mac smoothly.
Overview
Mac screen sharing works great on a local network. But once you leave home, things get complicated. You have to deal with VPNs, port forwarding, or router settings. Even then, it might not work.
So people switch to third-party remote tools. But those come with trade-offs. They rely on relay servers. They add latency. And your data goes through someone else's infrastructure.
With HomiPlay, you simply connect your two Macs and start using built-in screen sharing instantly. No VPN. No port forwarding. No extra tools.
Your connection is more direct. Control feels more responsive. And your device stays private without being exposed to the internet.
⚡ Simpler: No complex network setup. Fewer steps. Just connect and start
🚀 Smoother: More responsive control with less lag. Closer to using your device locally
🔐 Safer: No third-party routing. No exposed endpoints. Your data stays private
Benefits
No need for port forwarding or VPN. Connect directly to your device
Direct connections reduce latency and improve remote desktop performance
No exposed public endpoints, so connections are less likely to be blocked by firewalls or security policies
No servers to deploy or maintain. Less setup and less overhead
Setup Steps
Install HomiPlay on the Target Mac and Enable Screen Sharing
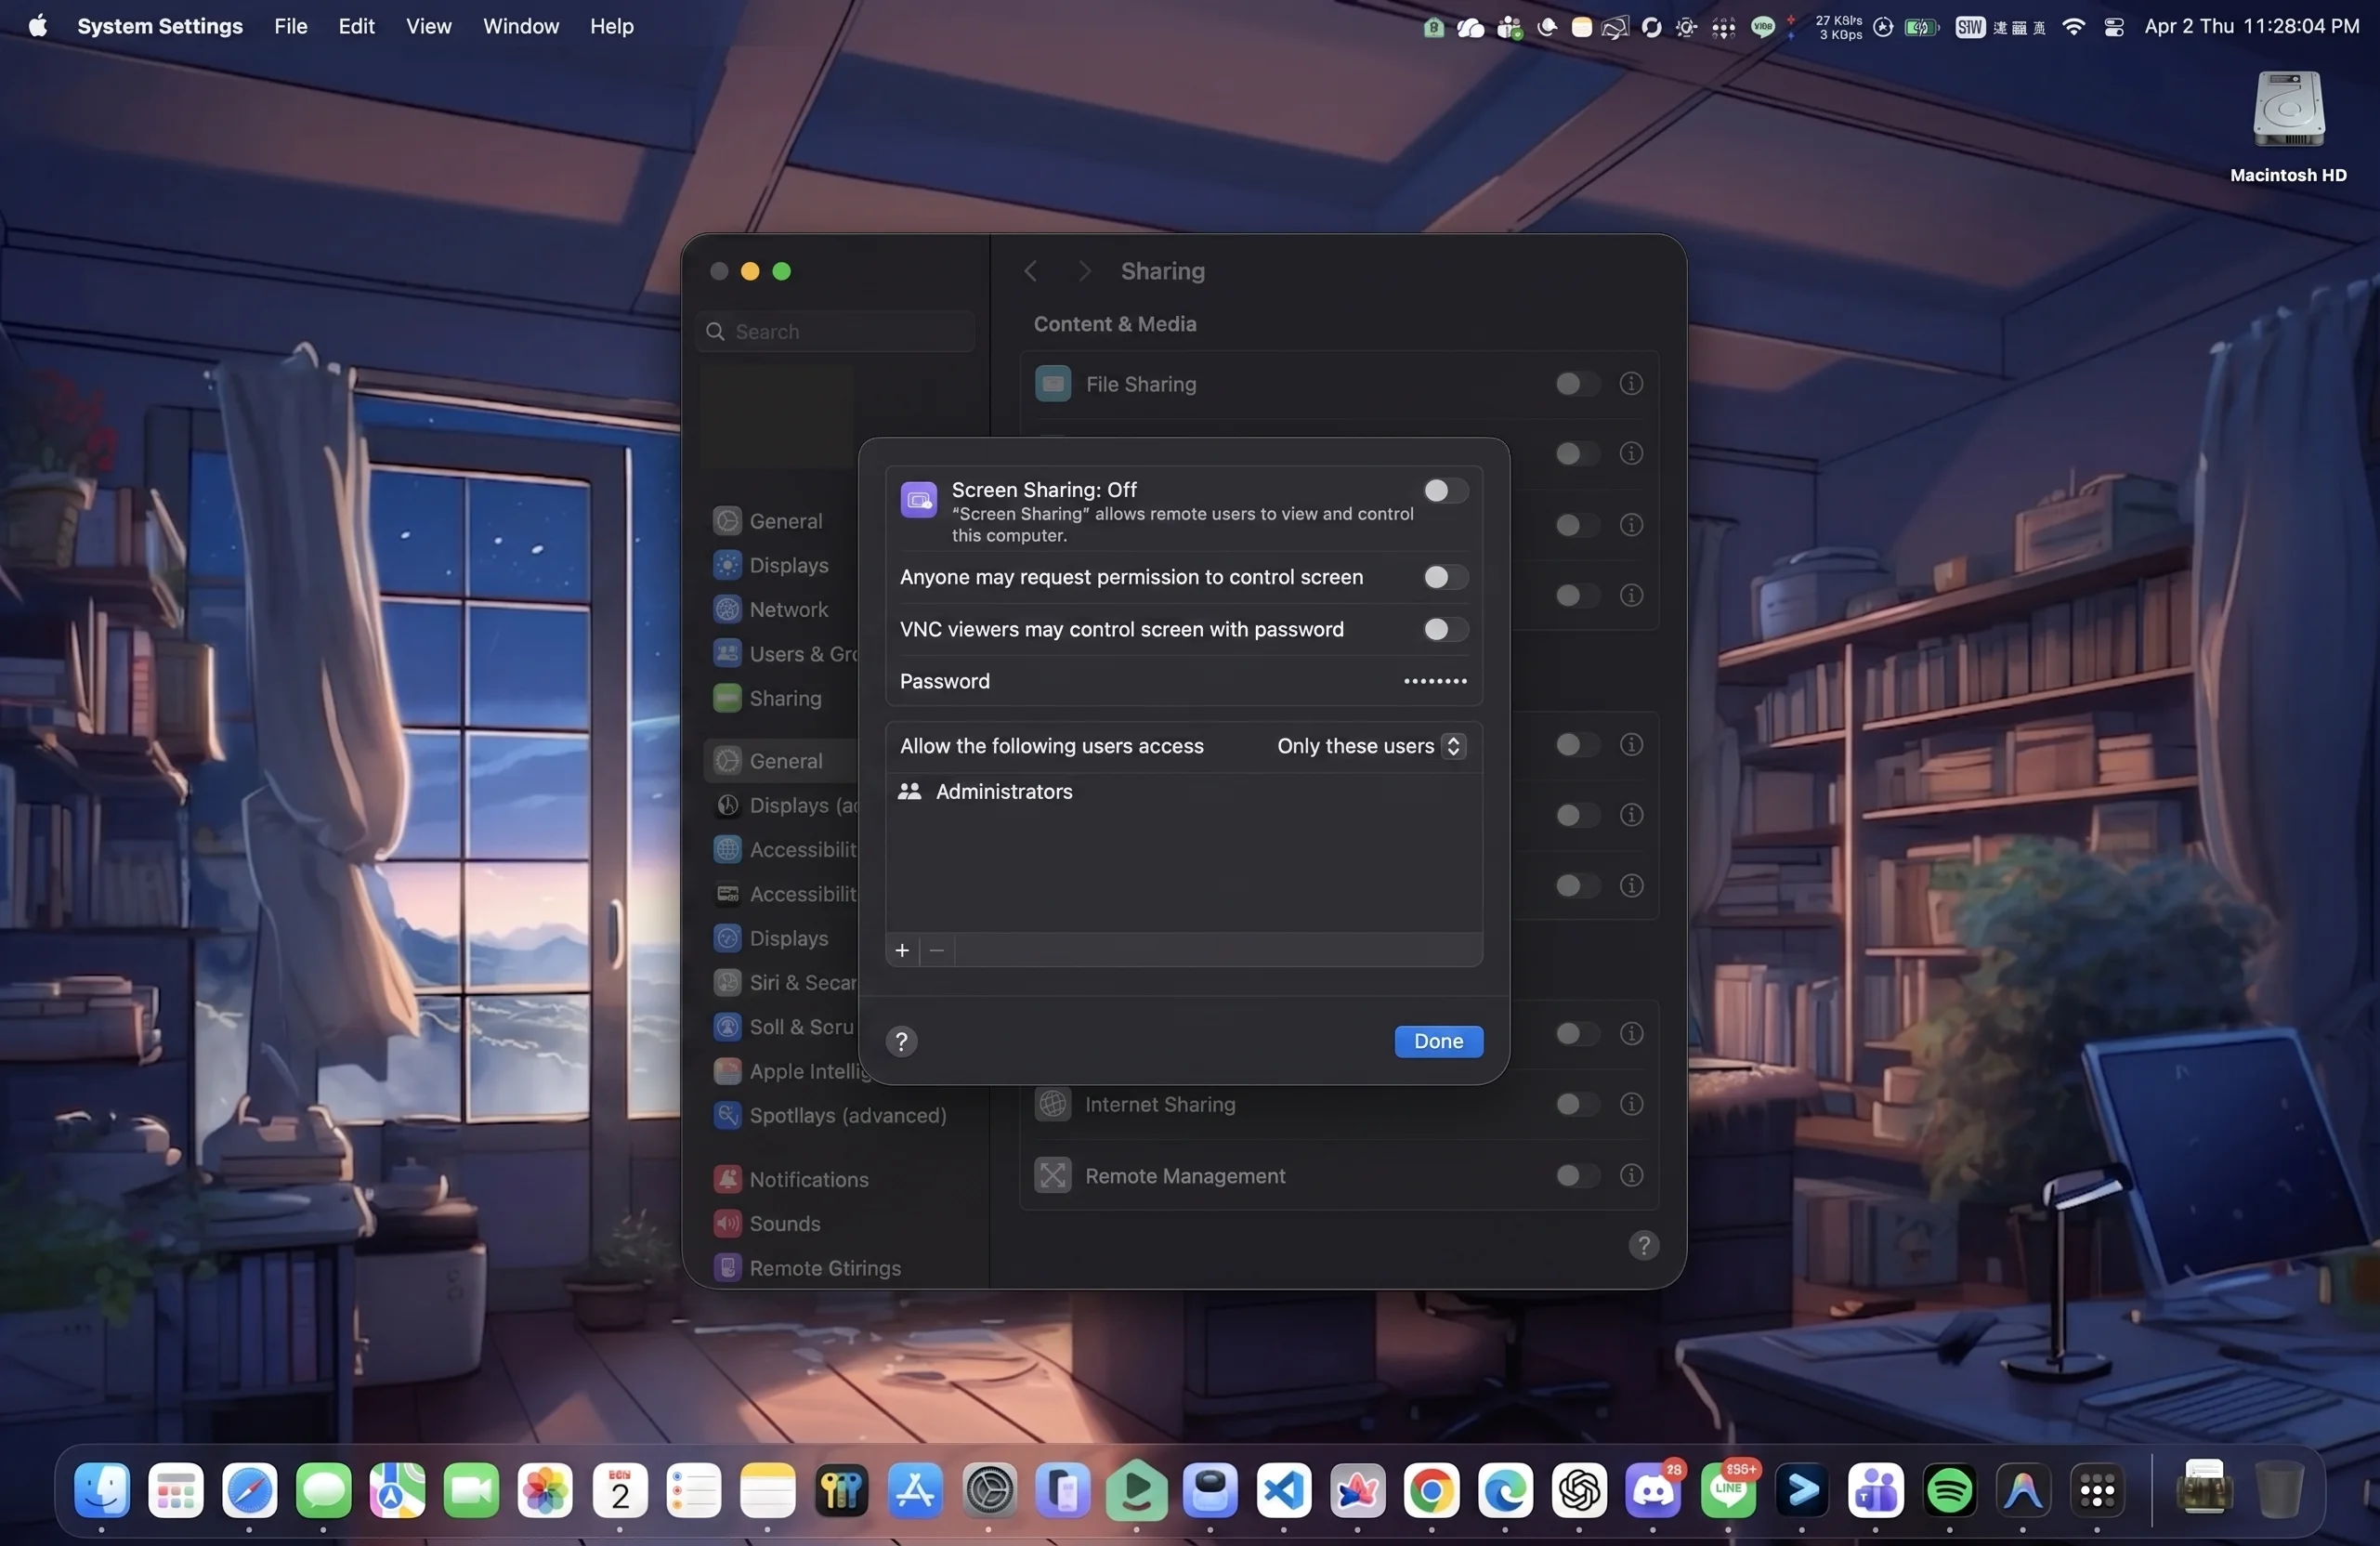
Install HomiPlay on the Mac you want to control and log in. Then go to "System Settings" > "General" > "Sharing", and turn on "Screen Sharing" to activate the built-in VNC server.
Confirm the Target Mac is Online and Obtain Its IP
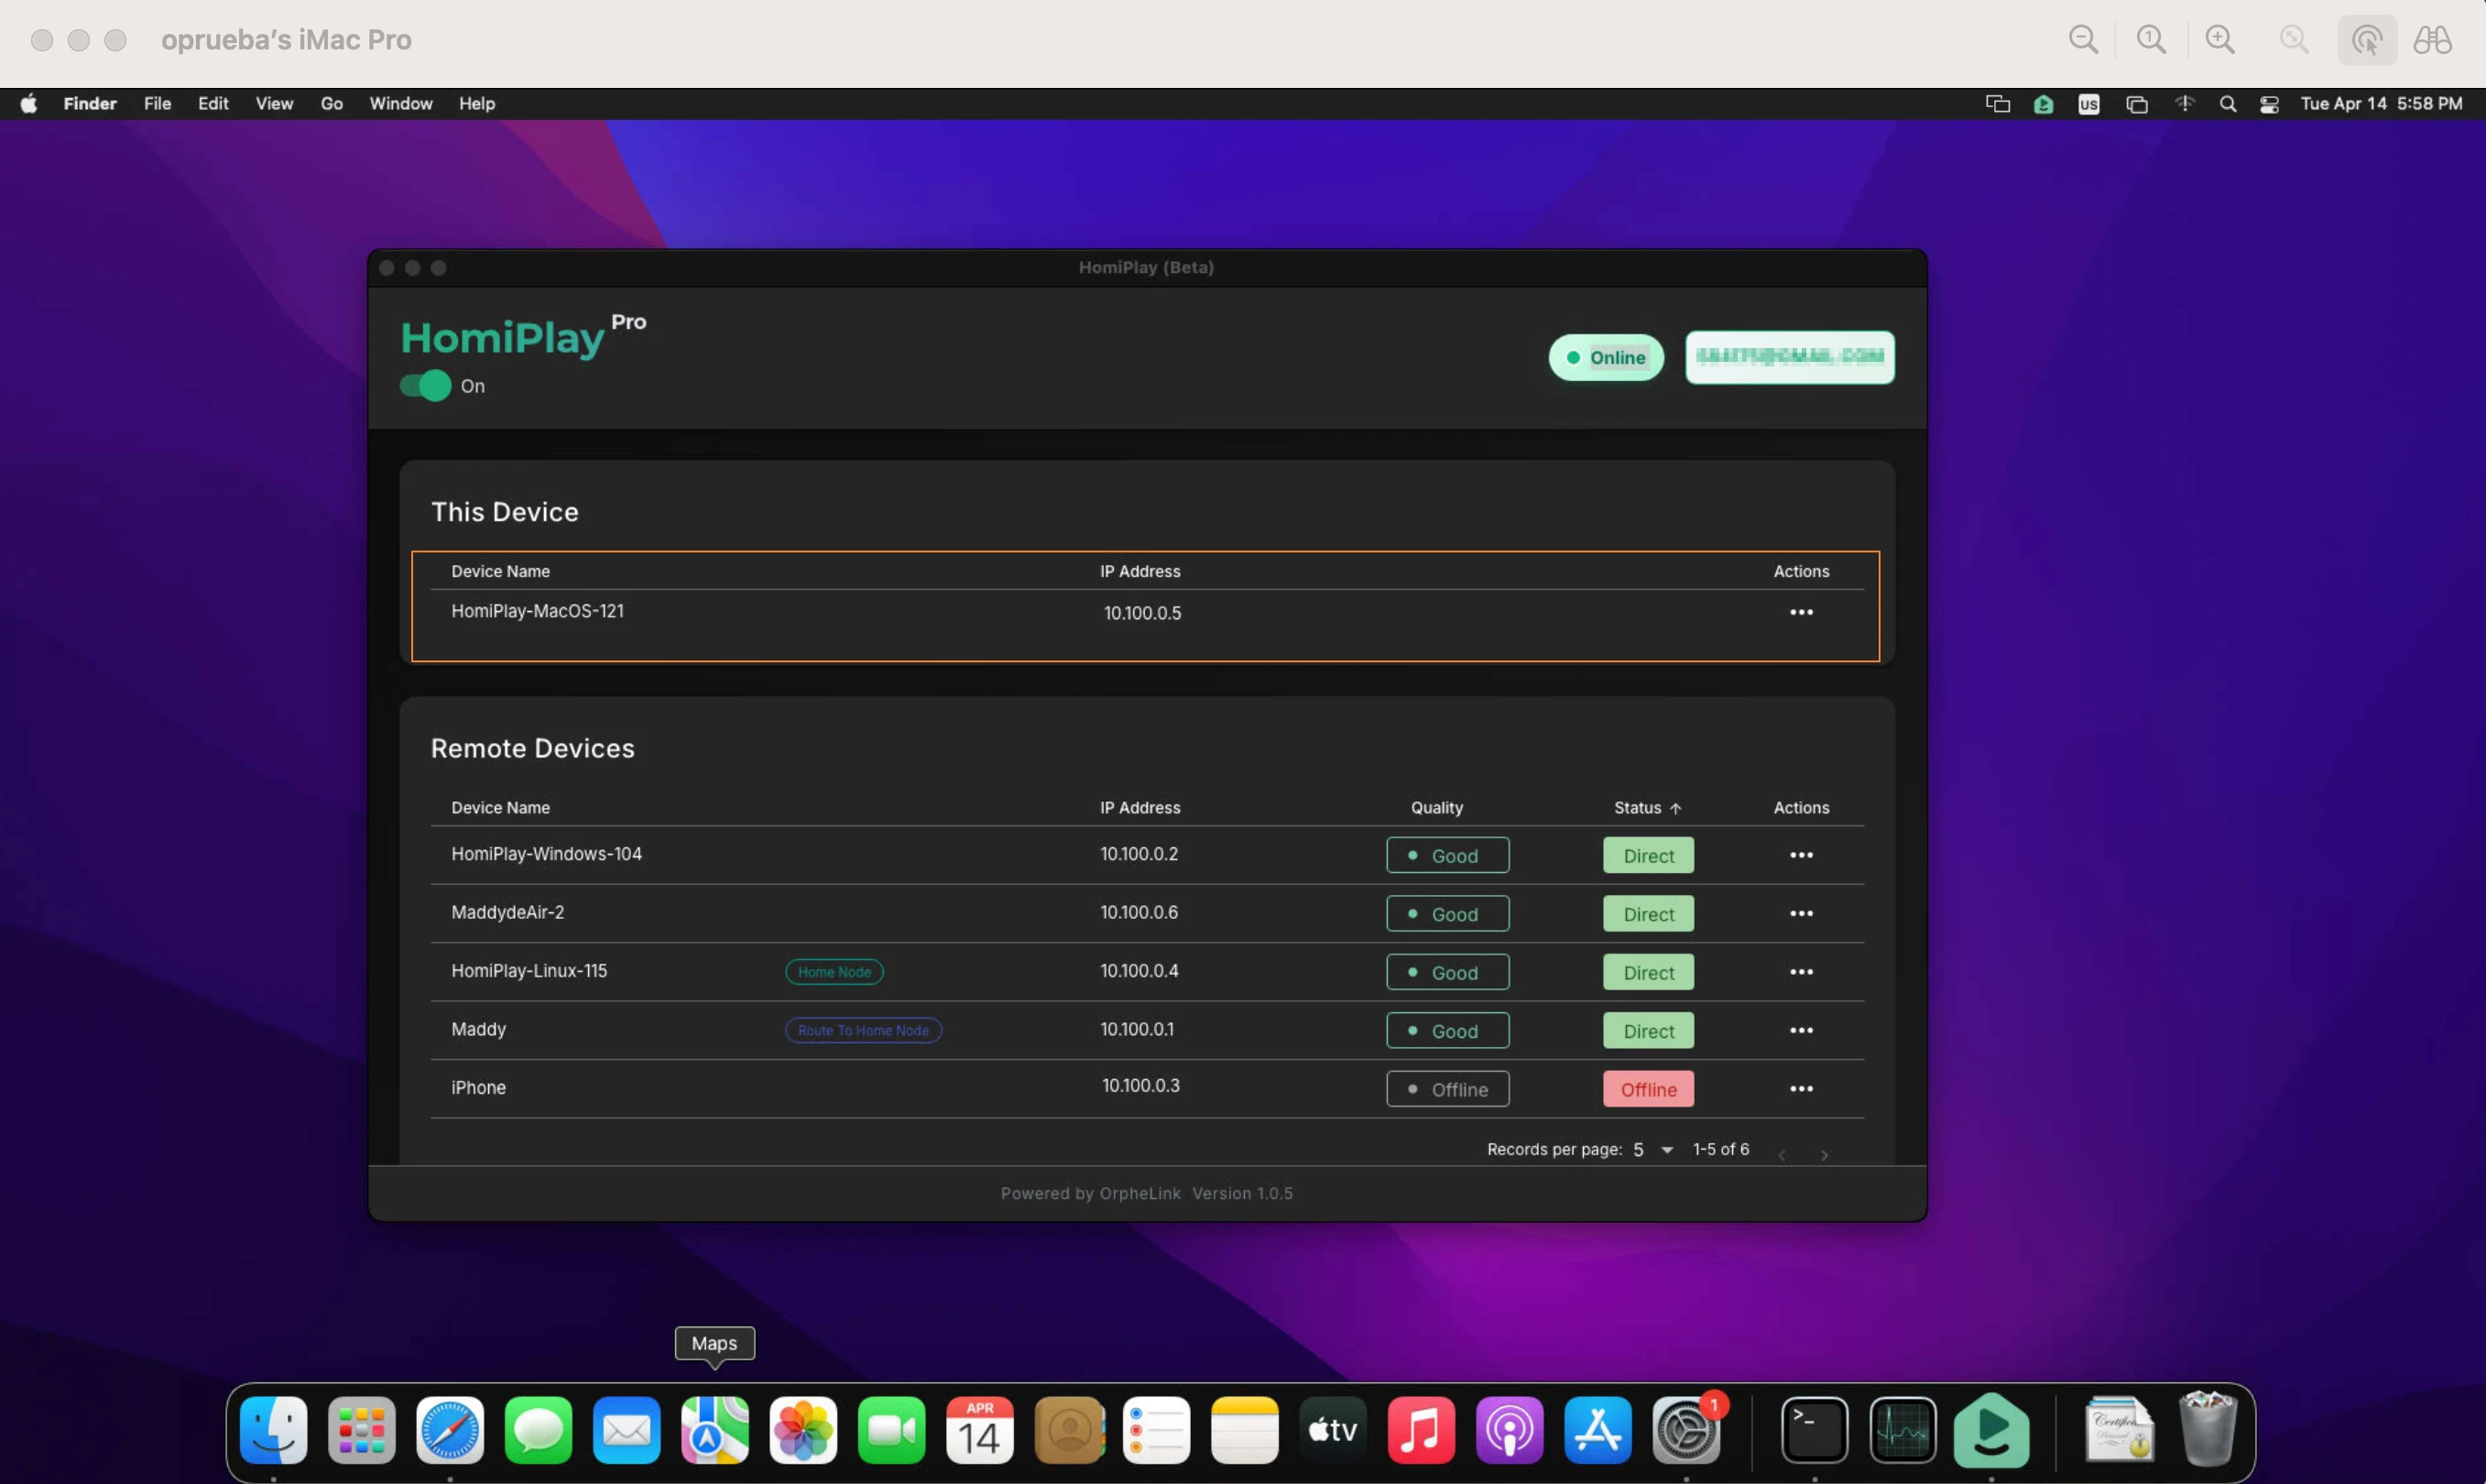
After logging into the HomiPlay account on the target Mac, ensure the device is successfully connected and online. Then, locate and write down the virtual IP address assigned to this computer.
Start HomiPlay on the Client Mac
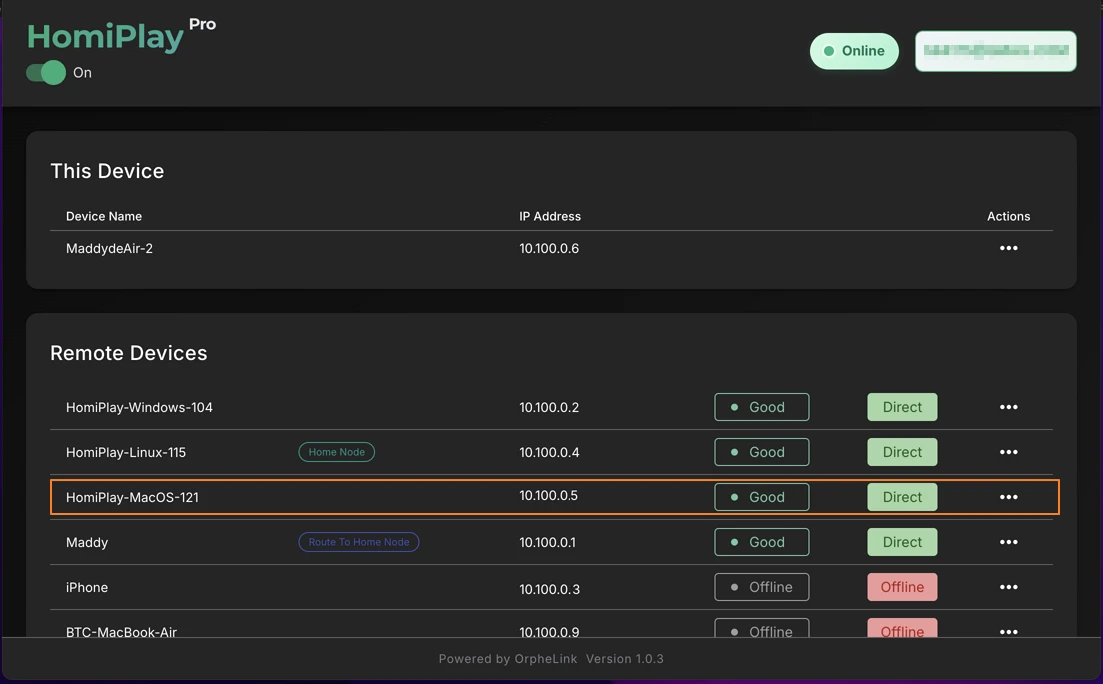
On the remote Mac laptop you are currently using, install HomiPlay and log in with the same account. Once connected, check your remote device list to verify that the target Mac is "online," ensuring both devices are in the same secure virtual network.
Connect via Built-in VNC to the Target Mac
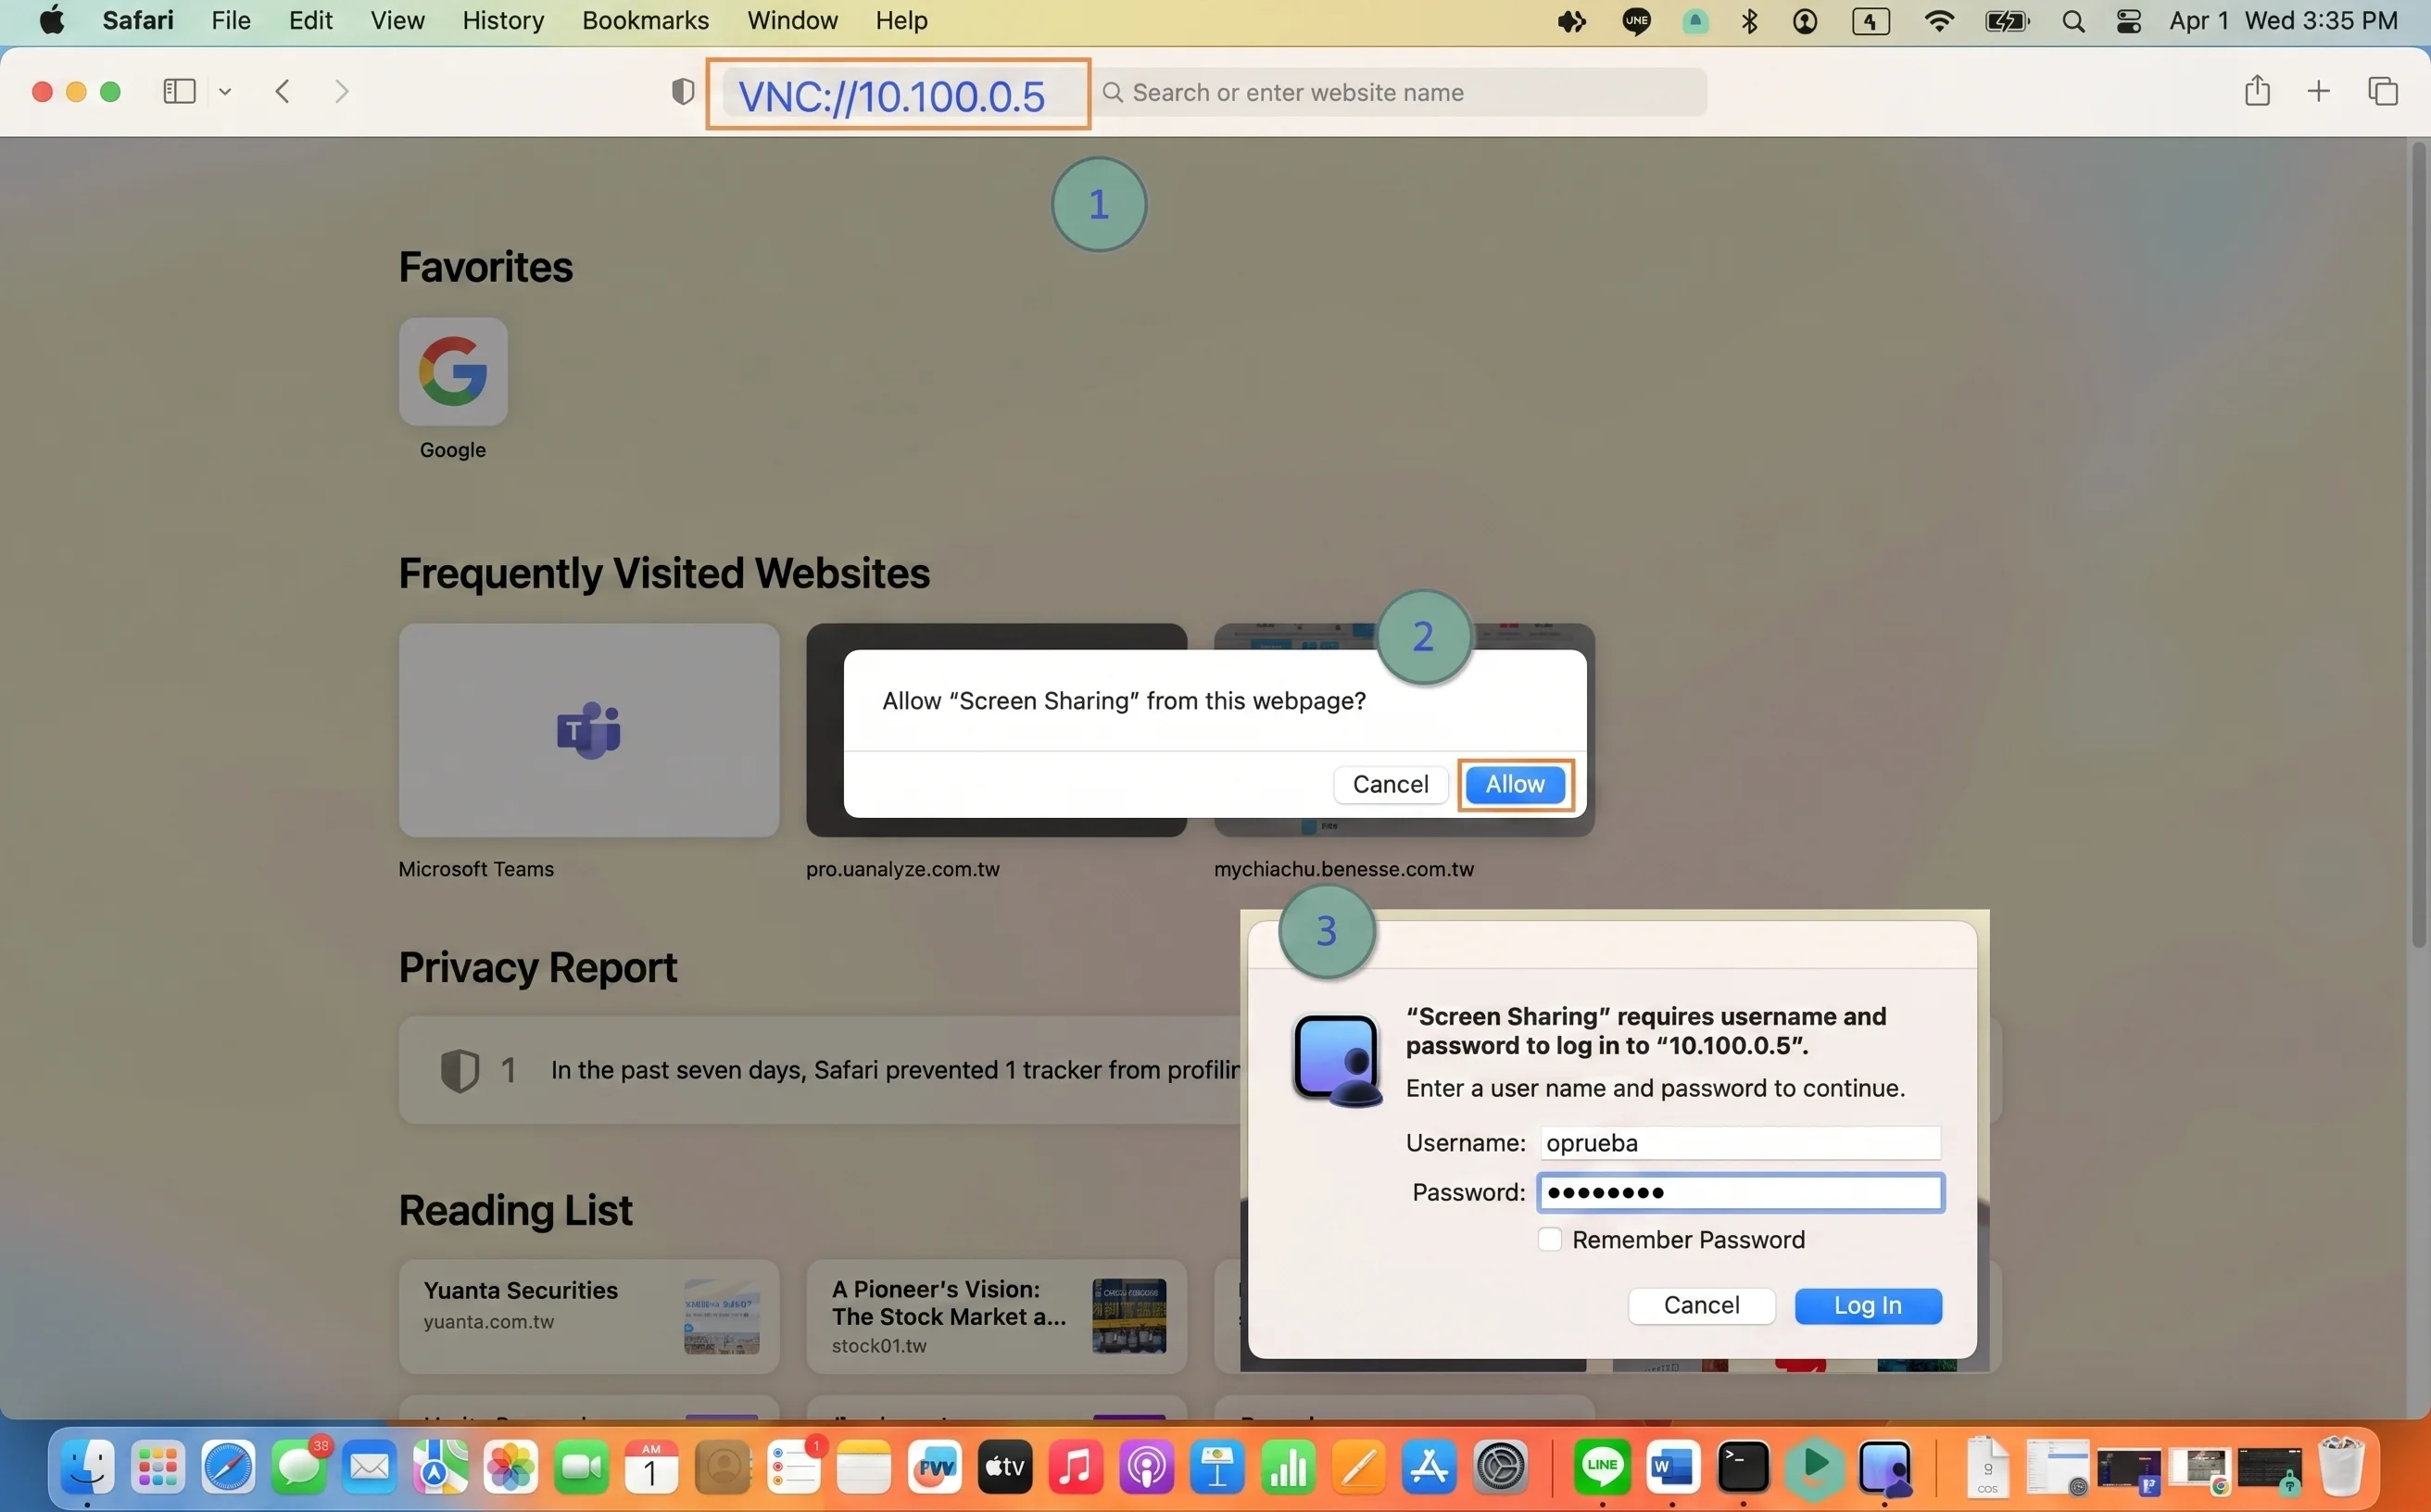
On the client Mac, open Finder, click "Go" > "Connect to Server..." in the top menu bar (or press Cmd+K). Type "vnc://" followed by the target's HomiPlay virtual IP (e.g., vnc://10.x.x.x). Click "Connect," and enter the username and password of the target Mac to securely begin remote operations.
Other Use Cases
Play your PS5 remotely just like you're at home.
Connect faster, play without lag, and enjoy clear visuals.
Learn MoreAccess Your Home NAS via HomiPlay
Securely and quickly access files, photos, and multimedia on your home NAS from anywhere.
Learn MoreSet up Windows Remote Desktop the simple way. Make remote work feel smooth.
Combine HomiPlay's secure tunnel with the built-in Windows Remote Desktop feature for a low-latency, high-security remote desktop experience.
Learn MoreStay safe on public WiFi with your own VPN.
Route your connection back home so your data is no longer exposed.
Learn More