
Help Center
Learn how to install, register, and use HomiPlay features
Installation Guide
Follow these steps to easily install HomiPlay for your operating system
Step 1: Download the Windows Installer
Go to the official download page and download the HomiPlay installer (.msi) for Windows (supports x86 and ARM architectures).
Step 2: Run the Installer
Open the downloaded file and click "Next" following the on-screen instructions. If prompted by User Account Control (UAC), click "Yes".
Step 3: Launch and Sign In
Once installed, launch HomiPlay from your Start Menu or desktop shortcut. Sign in or register to get started.
Account Registration
Create your HomiPlay account and start experiencing remote access
Step 1: Open Registration Page
Launch the HomiPlay app and click "Create a new account" at the bottom of the interface.
Step 2: Fill in Account Details
Enter a valid email address. The system will send a verification email and provide a default password.
Step 3: Log In and Change Password
Use the default password provided in the email to log in. You can find the option to change your password in the top right menu.
Home Node Setup Guide
Pro onlyConfigure your device as a Home Node to route your network traffic securely
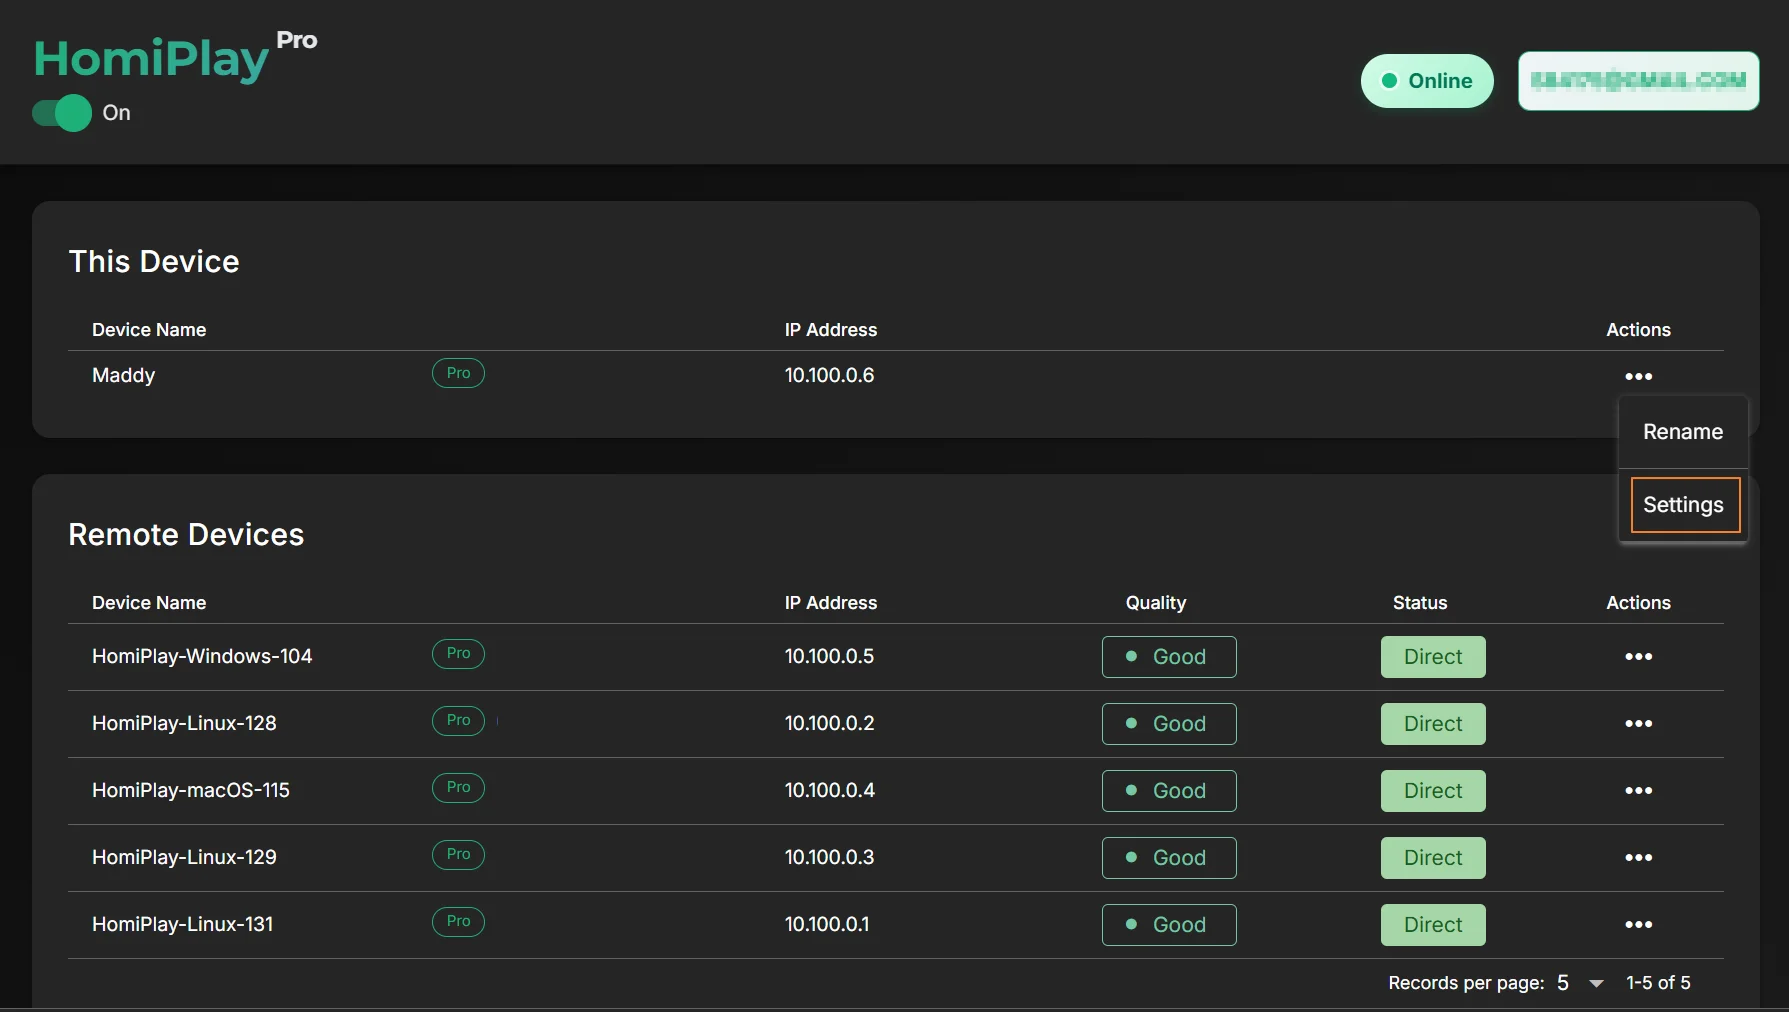
Step 1: Open Device Settings
In the device list, find the device you want to configure, click its settings icon on the right, and choose "Settings" from the menu to open the device settings.
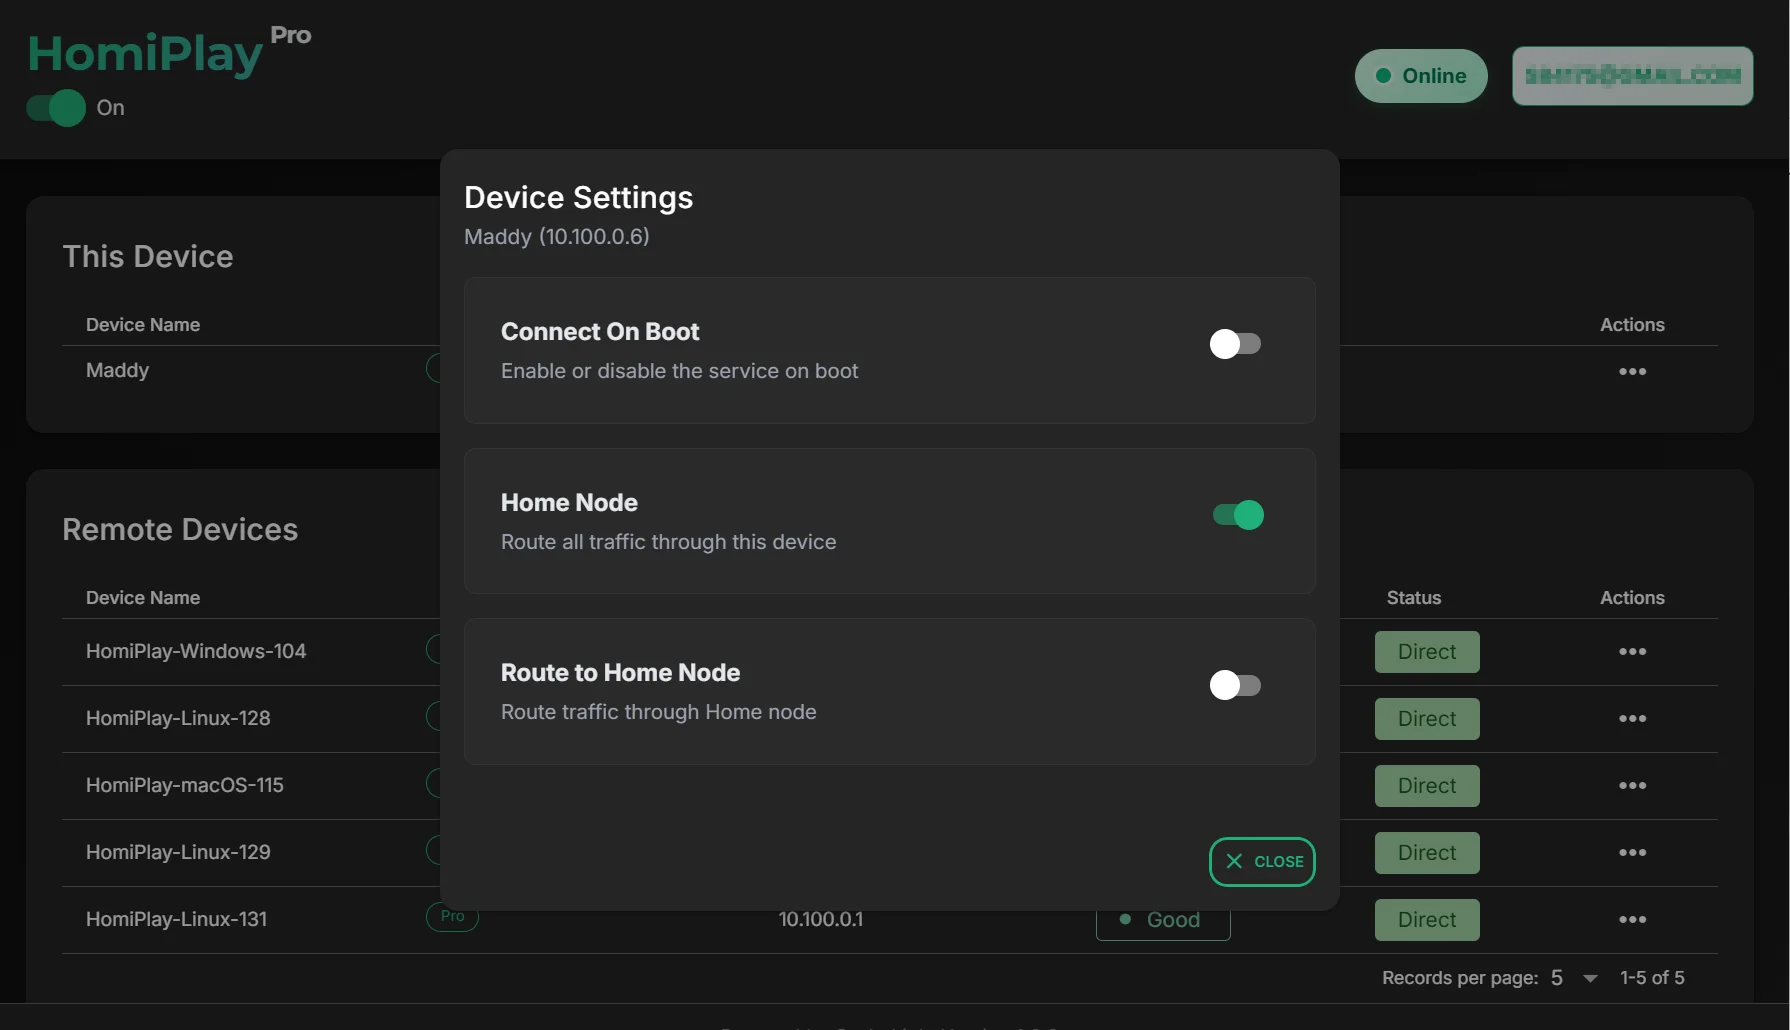
Step 2: Enable the Home Node Feature
In the settings of the device you want to use as a Home Node, turn on the "Home Node" switch. Once enabled, that device will start providing the Home Node function, and you will see a Home Node label in the device list to confirm it was enabled successfully.
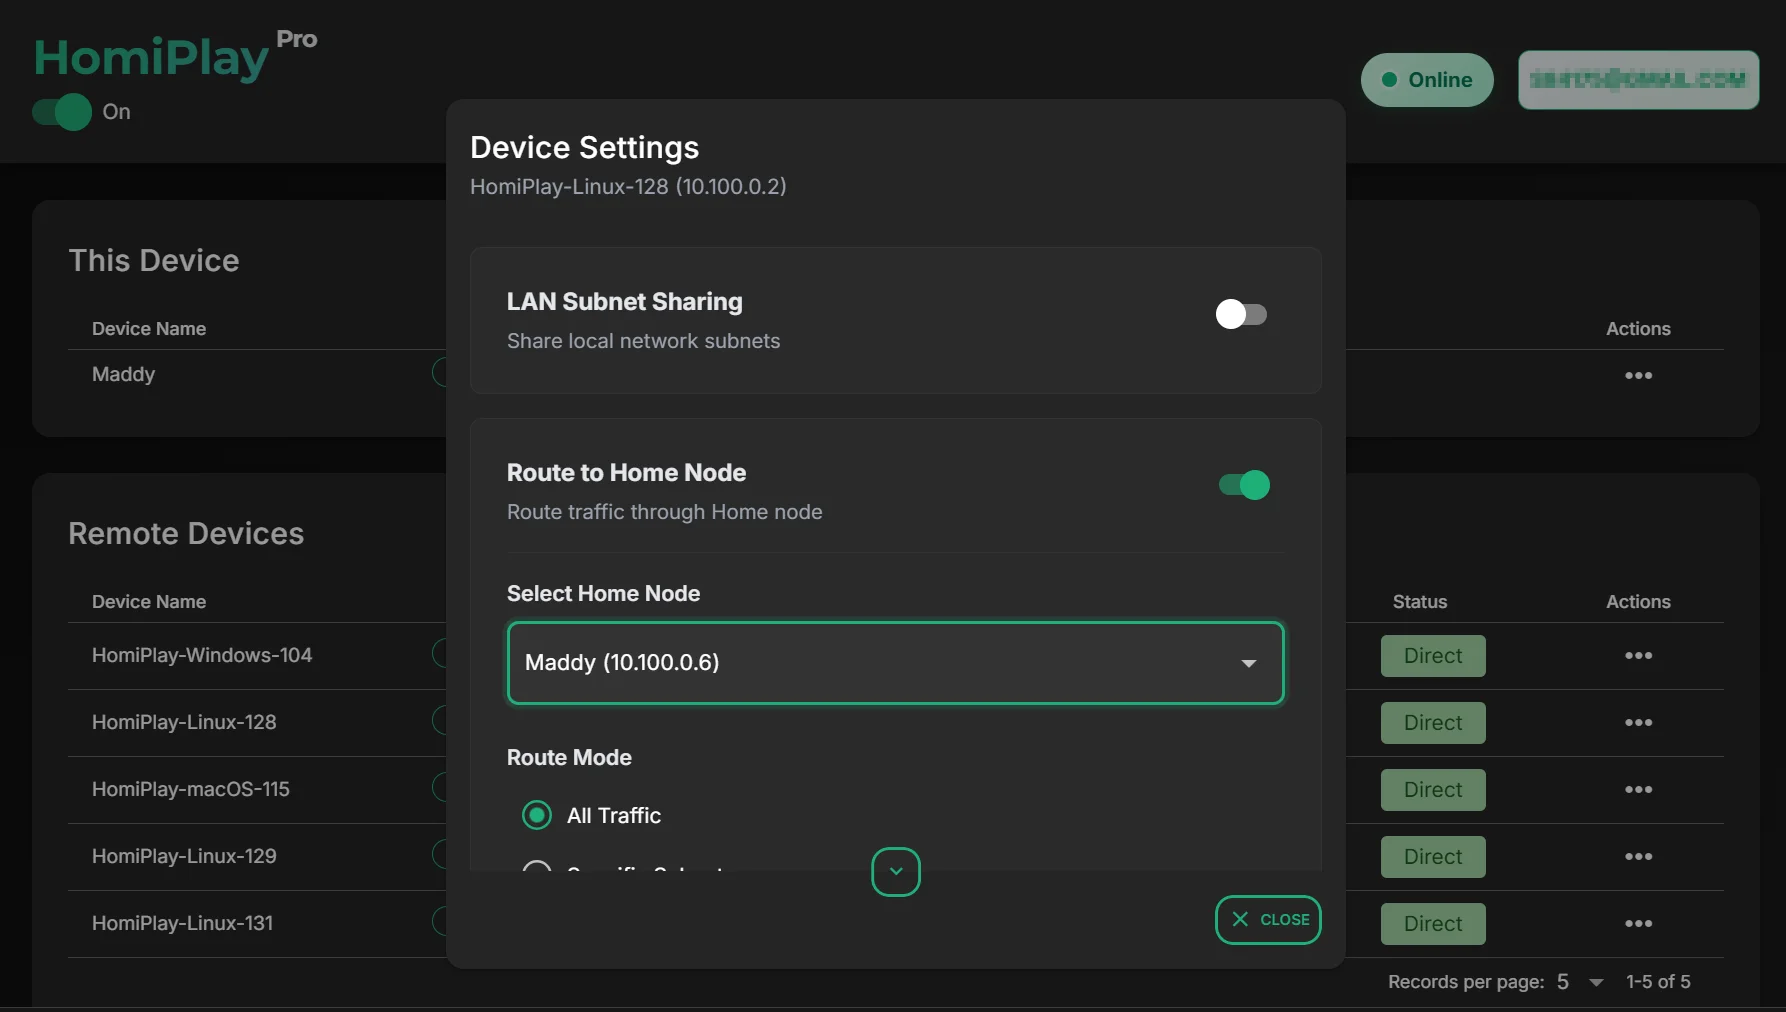
Step 3: Configure Route to Home Node
In the settings of the device you want to route through Home Node, turn on the "Route to Home Node" switch and select which Home Node to use. After saving, you will see a Route to Home Node label in the device list, confirming the setup was completed successfully.
Pro Trial Activation
Experience all premium features with our 30-day free trial
Step 1: Access Account Plan
Click on "Account & Plan" in the top right corner of the application.
Step 2: Find Free Trial
In the free version overview, you will see the option for a 30-day free trial.
Step 3: Start Pro Version
Click "Start Free Trial." Your account will automatically be upgraded to the Pro version.
Step 4: Trial Expiration
You can check the expiration date in "Account & Plan." Once it expires, your account will automatically revert to the free version—no manual cancellation is required.